
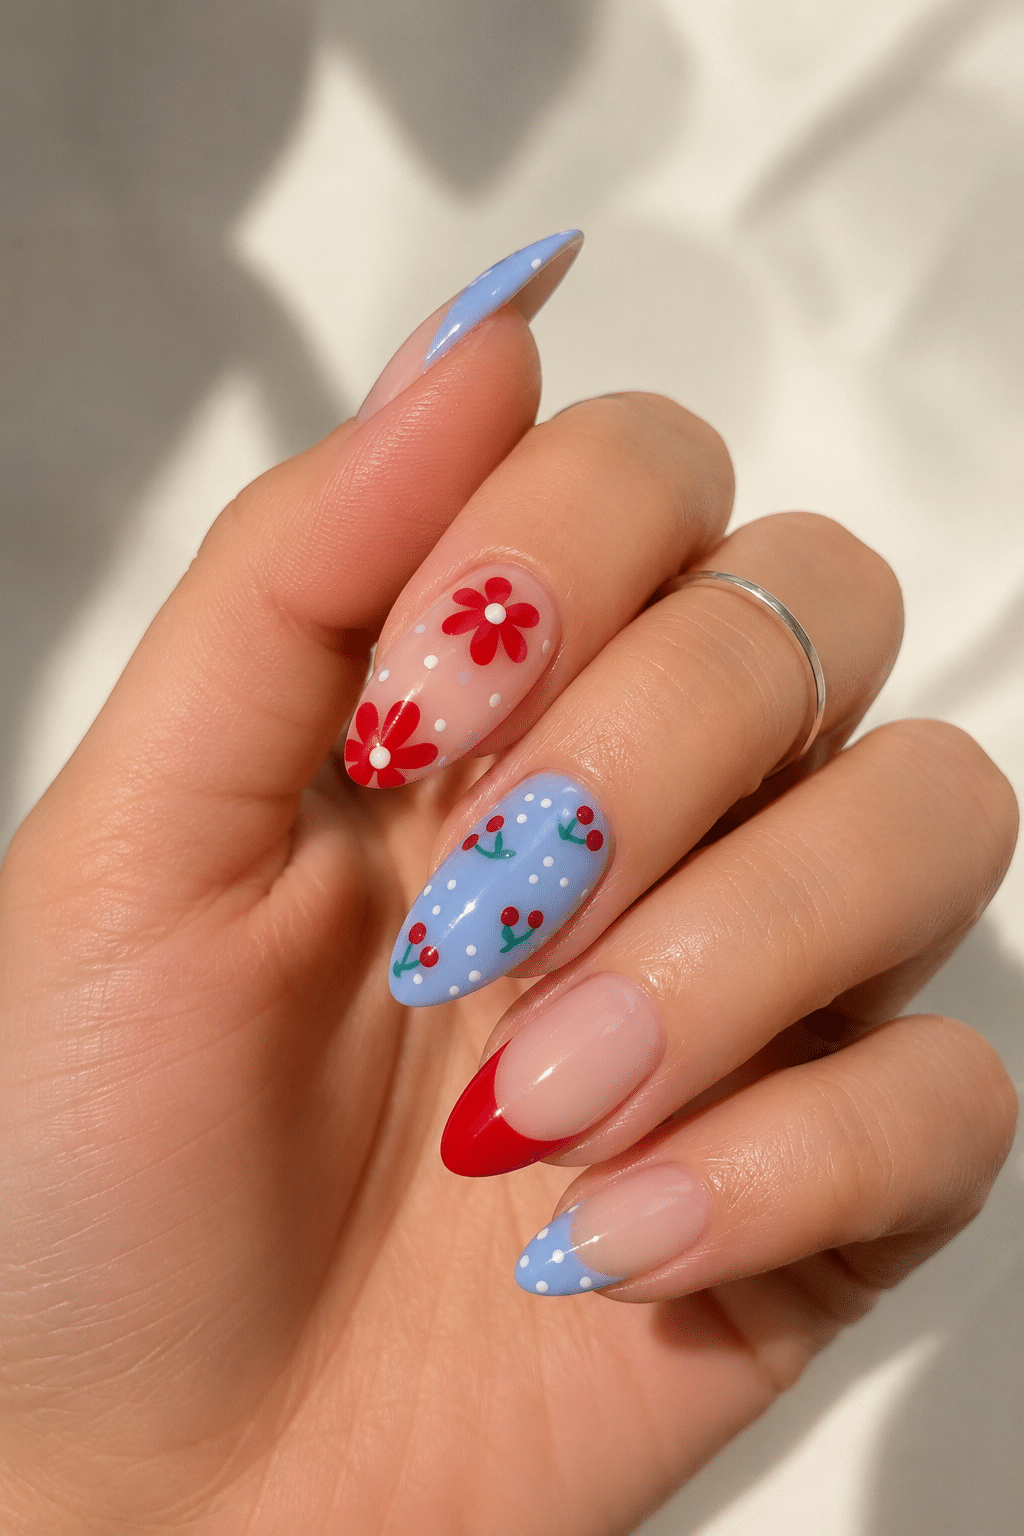
If you love delicate florals but still want your manicure to feel playful and modern, Cherry Blossom French Nails are a beautiful choice. The design in this image combines glossy red tips, soft baby-blue accents, tiny cherry motifs, white dots, and cheerful flower details on elegant almond-shaped nails. Cherry Blossom French Nails feel romantic without being overly formal, making them perfect for spring, summer, vacations, brunch dates, birthdays, and everyday wear.
What makes Cherry Blossom French Nails so charming is the contrast between classic French-tip structure and whimsical nail art. Instead of using only white tips, this manicure introduces vivid red and soft blue while keeping sections of the natural-looking nude base visible. The result is fresh, feminine, colorful, and easy to personalize.
Why This Nail Trend Feels So Fresh
Cherry Blossom French Nails combine several popular manicure ideas in one cohesive look: French tips, floral art, fruit-inspired details, pastel polish, and glossy finishes. Because the colors repeat across the set, each nail can have a different design without making the manicure look mismatched.
The red gives the nails energy, while the pale blue softens the overall palette. Small white dots add a light, playful finish, and the cherry details bring a cute seasonal touch. Cherry Blossom French Nails are especially appealing if you enjoy nail art that feels detailed but still polished.
The manicure is also a refreshing alternative to traditional flower nails. Instead of covering every finger with the same floral design, it mixes several patterns, creating a more creative and personalized finish.
The Almond Shape Makes Everything Look Elegant
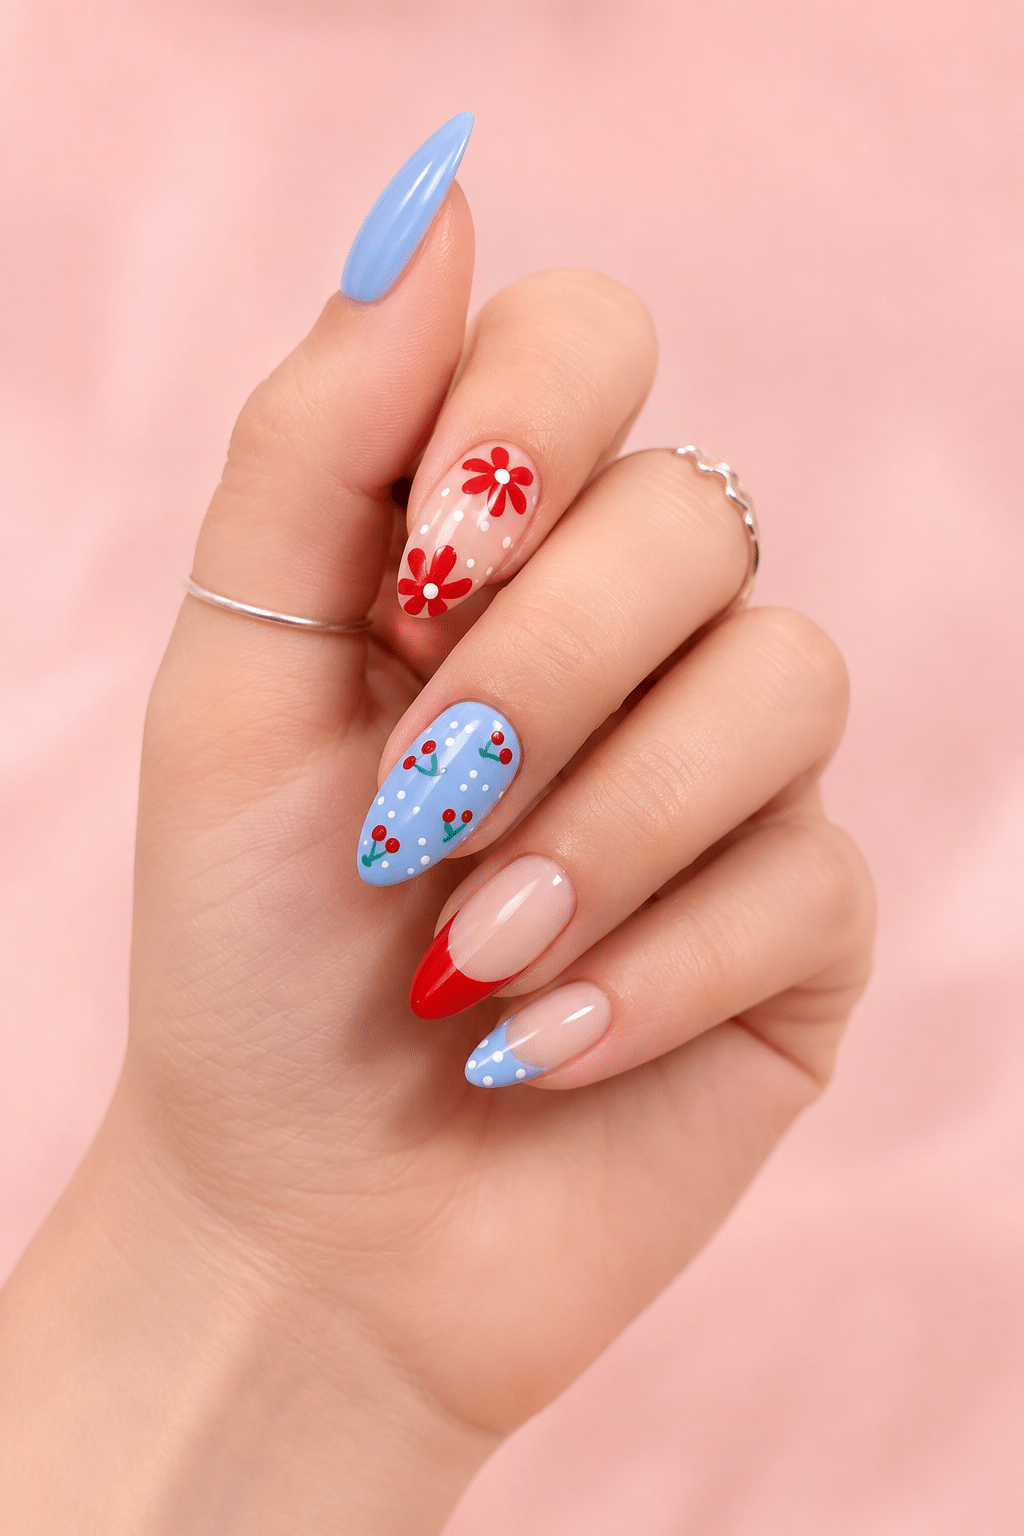
The medium almond shape shown in the image is ideal for Cherry Blossom French Nails because it creates enough room for detailed artwork while maintaining a feminine silhouette. The tapered tip also makes bright colors look more refined.
If you prefer shorter nails, you can still recreate the look on short almond or oval nails. Keep the flowers and cherries smaller and simplify the French tips slightly. Longer nails give you more space for detailed blossoms, curved tips, dots, and tiny stems.
Square or squoval nails can also work, but almond nails are especially flattering when you want soft floral art mixed with bold color.
Start With a Soft Nude Base
A sheer nude or milky pink base is the perfect foundation for Cherry Blossom French Nails. It allows the brighter red and blue accents to stand out without making the manicure feel too heavy.
Choose a base shade that closely complements your natural nail color. One or two thin coats are usually enough to create a smooth, polished surface while keeping the finish light and translucent.
The nude base is also what gives the French-tip nails their clean, modern appearance. It creates breathing room between the more decorative designs and keeps the manicure looking elegant.
Add Bold Red French Tips
Red French tips are one of the strongest elements in Cherry Blossom French Nails. They bring a classic manicure shape into a more playful and romantic color story.
You can create a curved red tip across the entire free edge or experiment with diagonal and side-swept variations. In this design, the glossy red tips look especially striking next to the soft nude base.
For an even more delicate finish, use a thin red line instead of a full tip. For a bolder look, extend the color slightly higher toward the center of the nail.
A rich cherry red works beautifully here because it adds just enough drama without overpowering the softer blue and nude tones.
Use Baby Blue for a Soft Contrast
The baby-blue accents are what make Cherry Blossom French Nails feel unexpected. Blue may not be the first color associated with cherry blossoms, but it works beautifully beside red, pink, and nude tones.
A pale periwinkle or powder blue can be used as a full accent nail, a French tip, or a background for tiny cherry art. The cool tone balances the warmer red and gives the manicure a fresh spring-and-summer feeling.
If you want a softer version, choose a muted pastel blue. If you prefer a stronger contrast, use a brighter cornflower shade.
The blue also prevents the manicure from feeling too predictable. It makes the red flowers and cherries stand out even more.
Add Tiny Cherry Details
Small cherry motifs give Cherry Blossom French Nails an extra playful personality. You only need a few tiny red circles with fine green stems to create the effect.
Keep the cherries small so they do not compete with the floral elements. One or two cherry clusters on a blue accent nail can be enough to make the theme clear.
A fine nail-art brush is best for creating the stems, while a dotting tool can help you make clean, rounded cherries. If hand painting feels difficult, tiny nail stickers or decals can give you a similar result.
You can also add tiny white highlights to the cherries to make them appear glossy and dimensional.
Make Florals the Romantic Focus
The red flower accents are another beautiful feature of Cherry Blossom French Nails. They add softness and connect the manicure back to the cherry-blossom inspiration.
Try painting simple five-petal flowers over a sheer nude base. A tiny white dot in the center makes each blossom look brighter and more dimensional. You can add one larger flower or several smaller blooms depending on how detailed you want the nail to feel.
For a subtler version, use pale pink petals instead of red. For more contrast, combine red petals with tiny white flowers.
Keeping some negative space around the flowers is important. It prevents the artwork from becoming crowded and lets each blossom stand out.
White Dots Add a Playful Finish
Tiny white dots are an easy way to bring Cherry Blossom French Nails together. They appear beautifully over both red and blue backgrounds and can resemble small petals, sparkles, or decorative confetti.
Use a small dotting tool and keep the spacing slightly irregular for a softer, handmade look. Perfectly even dots create a more graphic style, while scattered dots feel whimsical.
Because the dots are so simple, they are also one of the easiest details to recreate at home. Even beginners can use them to add personality without needing complicated nail-art techniques.
How to Keep the Mixed Designs Cohesive
When a manicure includes florals, cherries, French tips, solid colors, and dots, it can easily become too busy. Cherry Blossom French Nails avoid that problem by repeating the same small color palette throughout the entire set.
Stick to four main shades: sheer nude, cherry red, baby blue, and white. Add a tiny touch of green only for stems or leaves. Repeating these colors makes every nail feel like part of the same design story.
A glossy top coat also helps unify the manicure. It smooths the surface and gives every pattern the same polished finish.
Another useful trick is to leave one or two nails simpler. A solid blue nail or clean French tip provides visual space between the more detailed designs.
How to Recreate the Look at Home
To create Cherry Blossom French Nails at home, begin by shaping your nails into a soft almond or oval shape. Apply a base coat, then add one or two thin layers of sheer nude polish.
Next, paint the red and blue French tips using a fine nail-art brush. Add a baby-blue accent nail if desired, then decorate it with tiny cherries and white dots. On another nail, paint simple red flowers over the nude base.
For cherries, make two tiny red dots close together and connect them with thin green stems. For the flowers, create five small red petals around a white center.
Work slowly and allow each layer to dry before adding the next detail. Finish with a glossy top coat to protect the artwork and give the manicure a salon-style shine.
Salon Tips for Getting the Best Result
If you want Cherry Blossom French Nails done professionally, bring a clear reference image and point out which elements matter most to you. You may want the same color combination but fewer flowers, or you might prefer more cherries and simpler French tips.
Ask your nail technician to adapt the design to your preferred length and natural nail shape. The set does not need to be copied exactly to capture the same mood.
You can also request gel polish if you want the glossy finish to last longer, especially if you are preparing for a trip or special event.
Before the appointment begins, choose your exact shades of red and blue together. This can make a big difference in how cohesive the finished manicure looks.
Cute Variations to Try
There are many ways to customize Cherry Blossom French Nails while keeping the original romantic look. Replace the red tips with pink, use lilac instead of blue, or add tiny rhinestones to the centers of the flowers.
You could also try micro-French tips for a more minimal manicure. Another option is to use a soft blue ombré background behind the cherry details.
For a more glamorous version, add a subtle chrome glaze over one or two nails. For a softer everyday look, keep most nails nude and use the artwork only as accents.
Tiny bows, miniature hearts, silver details, or delicate glitter can also work beautifully if you want to make the design more decorative.
Best Occasions for This Manicure
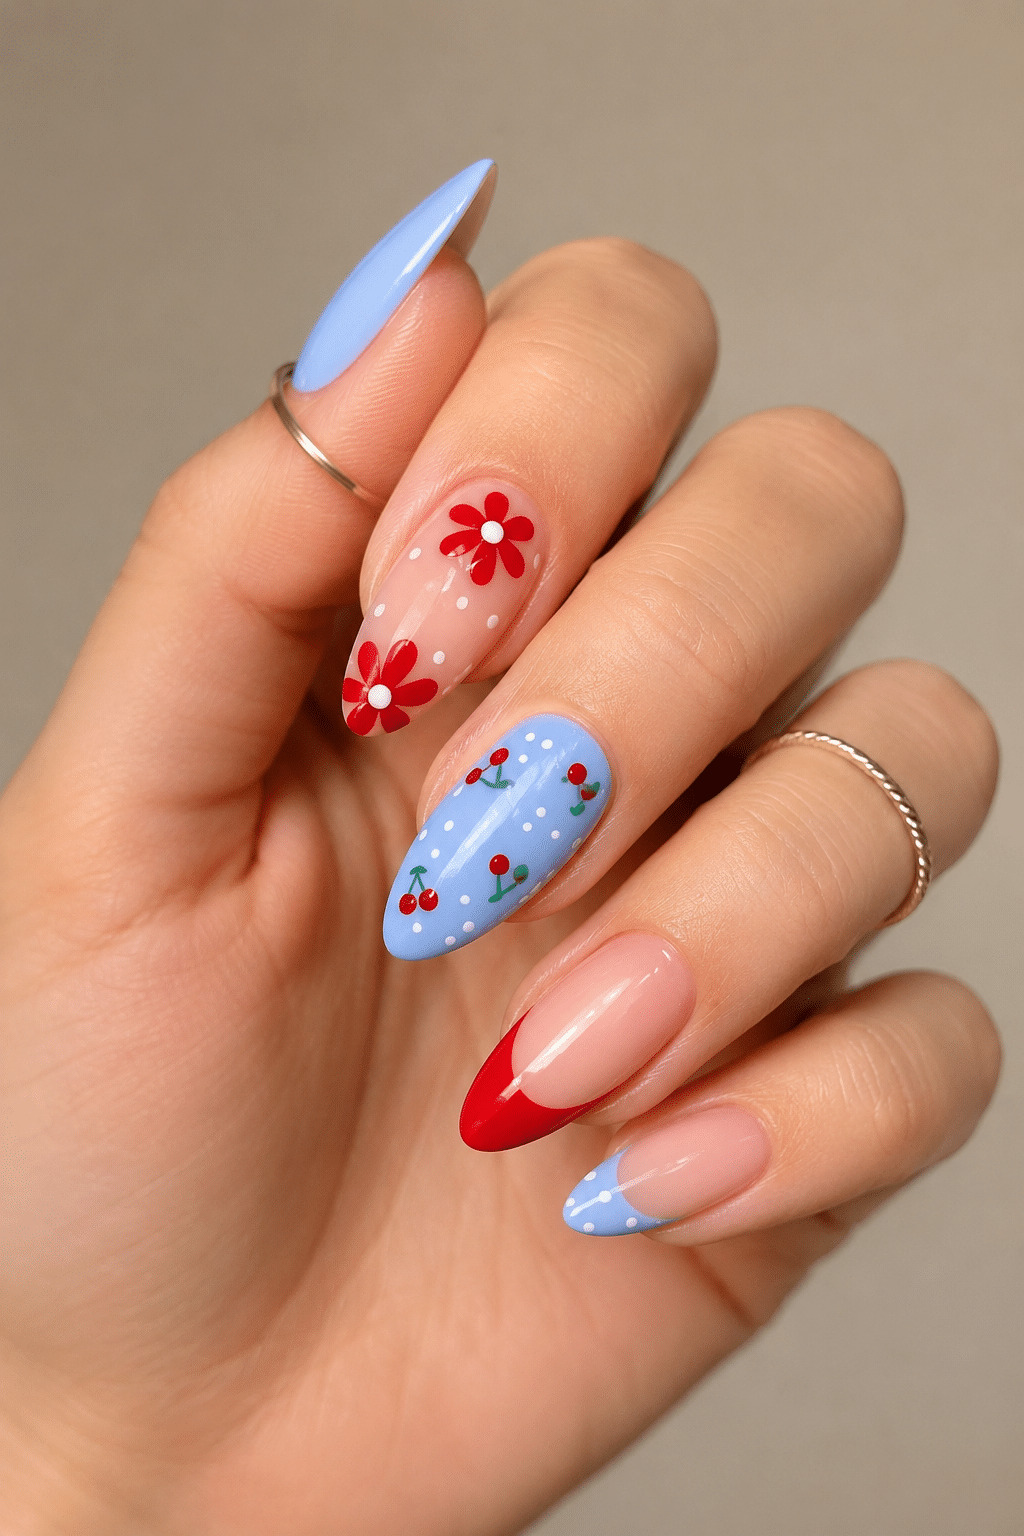
Cherry Blossom French Nails are especially pretty for spring celebrations, summer holidays, garden parties, brunches, birthdays, picnics, romantic dates, and weekend trips. The mix of red and blue can also work beautifully with white dresses, denim, pastel outfits, and simple neutral clothing.
Because the design combines both delicate and playful elements, it can easily move from casual daytime outfits to dressier occasions. Shorten the nails for a more practical everyday version or keep the medium almond length for a more statement-making manicure.
This style can also be a lovely choice for a vacation because the bright colors photograph beautifully in natural sunlight.
How to Make the Design Last Longer
Good preparation will help Cherry Blossom French Nails stay fresh for longer. Clean the nail plate before applying polish, gently manage the cuticles, and avoid leaving oil on the nails before your base coat.
Seal the free edge with top coat to help reduce chipping. Apply cuticle oil regularly to keep the skin around your nails hydrated and polished-looking.
Wear gloves when cleaning or washing dishes for long periods, and avoid using your nails to open packages or scrape hard surfaces. These small habits can make a noticeable difference in how long detailed nail art lasts.
If you notice the manicure losing its shine, adding another thin layer of top coat can quickly refresh the finish.
Final Thoughts
Cherry Blossom French Nails are a lovely way to combine romantic floral nail art with bright, playful color. The mix of glossy red tips, baby-blue accents, tiny cherries, white dots, and delicate flowers feels creative without losing its polished finish.
Whether you recreate the full manicure or borrow only a few elements, this style can easily be adjusted to your preferred nail length, favorite colors, and personal taste. Make it softer with pastel tones, bolder with brighter red, or simpler by choosing just one floral accent nail.
This manicure proves that a French design does not need to follow traditional rules. A touch of color, tiny fruit details, delicate flowers, and playful dots can transform a classic look into something fresh, cheerful, and completely unique.