
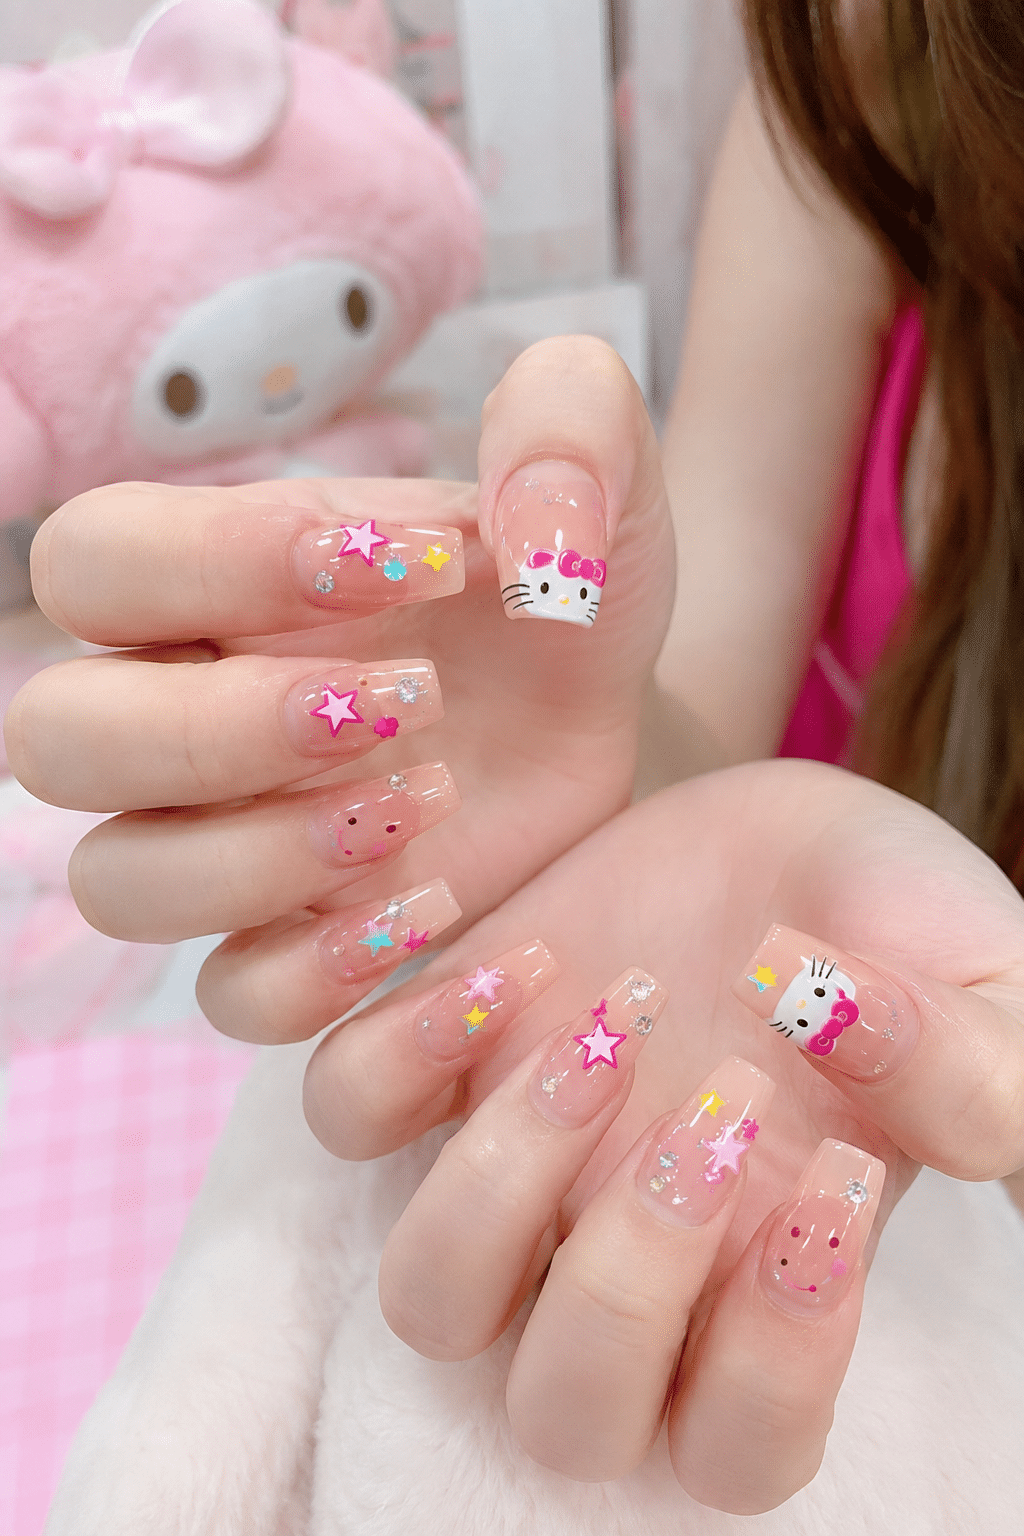
Kawaii Pink Star Nails are perfect for anyone who wants a manicure that feels sweet, colorful, sparkly, and full of personality. Inspired by the image, this design combines glossy translucent pink bases with hot-pink stars, pastel yellow and blue details, tiny rhinestones, adorable character-inspired faces, bows, and cheerful miniature accents.
What makes Kawaii Pink Star Nails so eye-catching is the balance between decoration and transparency. Instead of covering every nail with solid color, the design leaves plenty of the glossy base visible. The stars and tiny embellishments appear almost as if they are floating over the nails, creating a fun dimensional effect.
The medium square shape also gives the artwork enough room to shine. Each nail can tell its own little story while still fitting into the same pink, pastel, and sparkly theme.
Why This Manicure Is So Fun
Kawaii Pink Star Nails combine several playful nail trends without making the final manicure feel completely chaotic. One nail may feature a large outlined star, another can have small multicolored stars, while a statement nail introduces a cute character face or tiny bow.
Even though each nail is different, Kawaii Pink Star Nails remain cohesive because the same colors repeat throughout the manicure. Hot pink creates the strongest visual theme, pastel yellow adds warmth, baby blue gives contrast, and silver rhinestones bring sparkle.
This mix-and-match approach is ideal if you love manicures that look creative and personalized rather than perfectly identical.
The Perfect Kawaii Color Palette
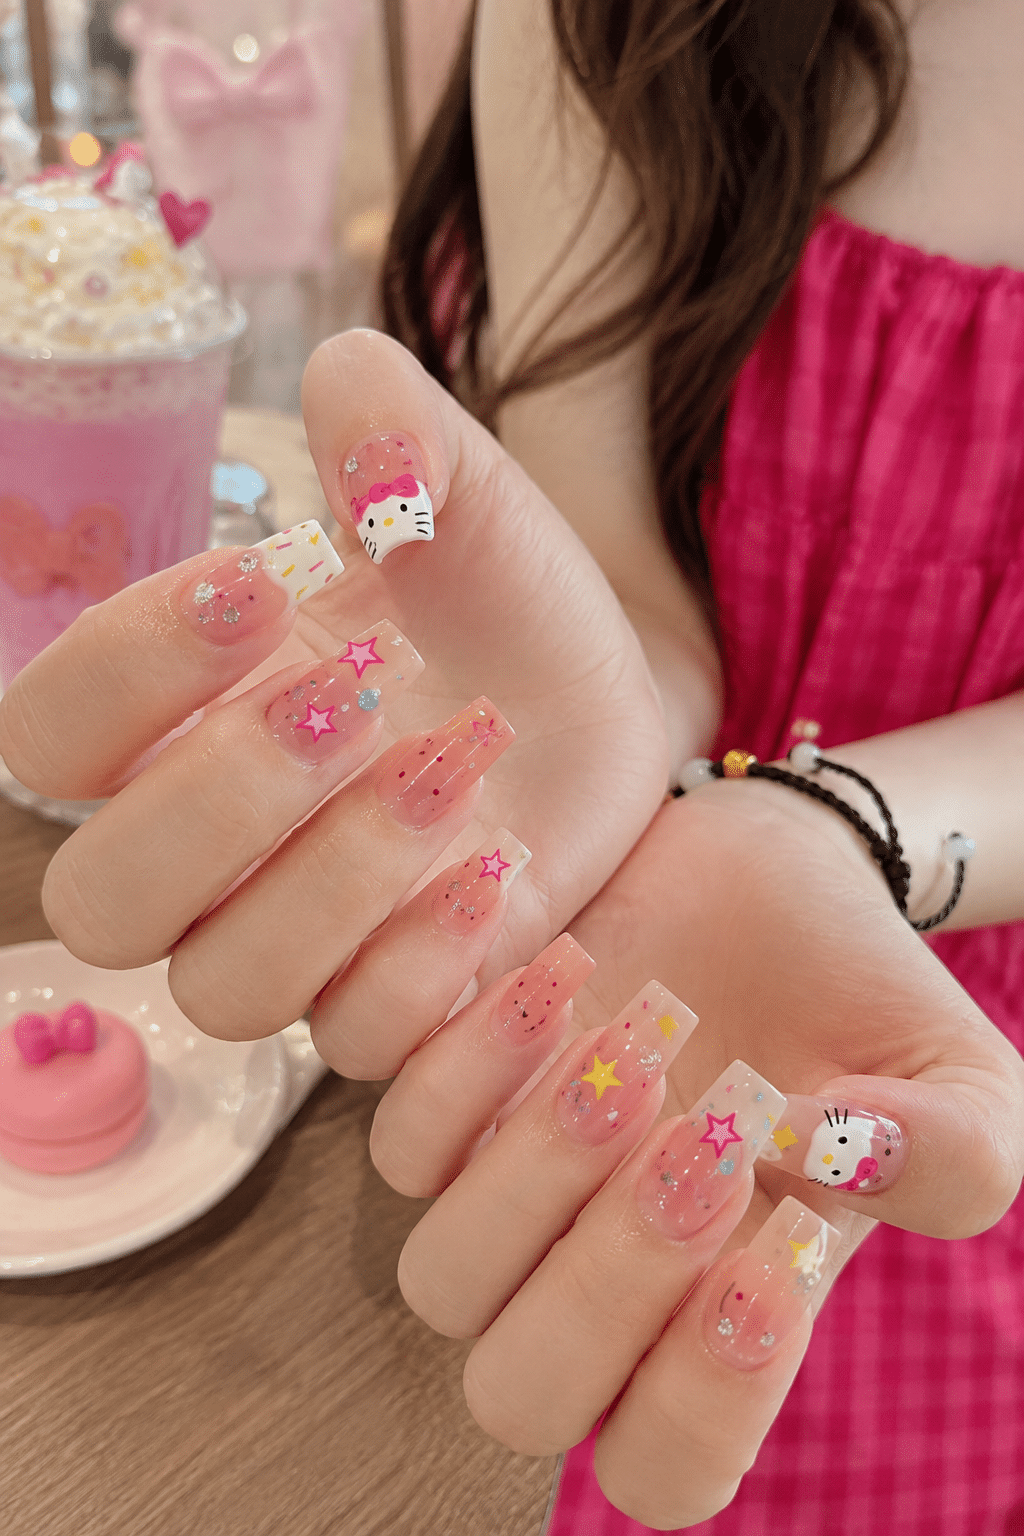
The color palette is what gives Kawaii Pink Star Nails their cheerful personality. The manicure starts with pink but uses several small complementary shades to create more dimension.
Sheer Jelly Pink
A transparent blush-pink base is essential for this look. It gives the natural nail a polished, healthy appearance without hiding it completely.
A jelly polish, clear pink builder gel, or translucent nude base works beautifully. Keeping the foundation light is one reason Kawaii Pink Star Nails can support so many decorative details without looking too heavy.
Hot Pink
Bright pink is the statement shade. It appears in the larger stars, tiny bows, outlines, and small accent details.
Fuchsia, bubblegum pink, and candy pink are all beautiful options depending on how bold you want the manicure to feel.
Baby Blue and Pastel Yellow
Small blue and yellow stars break up the dominant pink and create a colorful candy-inspired palette.
Lavender and mint can also be introduced if you want even more pastel variety.
Silver Sparkle
Clear crystals, silver glitter, and iridescent pieces help connect the cute artwork with a glamorous finish. The sparkle should remain small so the manicure still feels playful rather than formal.
Bright Star Nail Art
Stars are the main feature of Kawaii Pink Star Nails. The inspiration mixes several star sizes and styles, including large hot-pink outlines and miniature pastel stars.
Variation is important. Avoid placing the same star in exactly the same position on every nail. A few stars can sit near the tip, while others can be scattered diagonally or positioned closer to the center.
You can recreate this look using nail decals, stickers, stamping designs, glitter pieces, or hand-painted artwork. Mixing flat stars with a few reflective accents gives the manicure extra depth.
Cute Character-Inspired Details
Another playful element of Kawaii Pink Star Nails is the use of adorable character-style faces. The combination of a white face, tiny eyes, whisker-like details, colorful bows, and miniature accents gives the manicure its unmistakably cute aesthetic.
You do not need a character on every nail. In fact, one or two statement nails per hand usually look better because they give the eye somewhere to focus.
The remaining nails can use stars, gems, glitter, or simple smiley details to support the theme.
For an easier DIY manicure, choose high-quality nail stickers or decals rather than trying to paint every facial detail freehand.
Tiny Rhinestones and Glitter
Sparkling details make Kawaii Pink Star Nails look even more magical. The inspiration uses tiny clear rhinestones and glitter accents between the larger decorative pieces.
The trick is to vary the sparkle. Rather than covering an entire nail in crystals, place one small gem near a star, another near the cuticle, and perhaps a few tiny glitter pieces through the clear base.
This keeps the manicure light while still allowing it to catch the light beautifully.
If raised rhinestones are not practical for your lifestyle, holographic glitter or flat metallic decals can create a similar effect.
Why Square Nails Work So Well
The medium square shape complements Kawaii Pink Star Nails because it provides a wide surface for the decorative artwork. Larger stars fit comfortably across the nail, while character faces can be placed near the straight free edge without looking cramped.
A soft-square shape is a good alternative if you prefer rounded corners. It keeps the same visual space but may feel slightly more practical for everyday activities.
You can also recreate the theme on almond or oval nails. On those shapes, use smaller decorations and position the artwork vertically to follow the tapered silhouette.
How to Recreate the Look
Creating Kawaii Pink Star Nails is easiest when you treat the design like a collection of small layers rather than attempting all the decorations at once.
Step 1: Prepare Your Nails
Remove old polish and gently push back the cuticles. File the nails into a medium square or soft-square shape and make sure the lengths are relatively even.
Lightly buff the nail plate and remove all dust.
Step 2: Apply the Sheer Pink Base
Apply base coat followed by one or two thin layers of translucent pink polish. Do not make the base completely opaque.
The glassy foundation is important because it helps Kawaii Pink Star Nails maintain their light, floating appearance.
Step 3: Add the Largest Stars
Begin with your biggest decorations. Position one or two hot-pink stars on selected nails rather than every finger.
Cure or secure them before moving on to smaller details.
Step 4: Fill with Pastel Accents
Add small yellow, baby-blue, and pink stars around the larger decorations. Leave some clear space between the shapes.
You can also include tiny hearts or flowers if you want more variety.
Step 5: Create the Character Nails
Choose one or two fingers for your character-inspired artwork. Use a white detail, miniature bow, small eyes, and simple facial elements.
This playful accent is what gives Kawaii Pink Star Nails much of their distinctive personality.
Step 6: Add Rhinestones
Apply a few tiny crystals with gem gel or nail adhesive. Avoid putting too many raised stones near the very edge of the nail where they are more likely to catch.
Step 7: Seal the Design
Apply a glossy top coat over all flat artwork. Carefully secure the edges around any raised gems.
Finish with cuticle oil for a fresh, salon-quality shine.
Cute Variations to Try
One reason Kawaii Pink Star Nails are so much fun is that you can change the details while keeping the same playful concept.
Pink and Silver Stars
Keep the transparent pink base but limit the palette to hot pink, silver, and clear crystals. This version of Kawaii Pink Star Nails feels cleaner while still maintaining plenty of sparkle.
Pastel Rainbow Version
Add lavender, mint, baby blue, butter yellow, and peach stars. Keep pink as the dominant color so the manicure still feels coordinated.
Minimalist Kawaii Nails
Use one large star on each hand with several tiny gems and one simple character accent. Leave the remaining nails glossy and transparent.
Glitter French Tips
Apply fine pink or holographic glitter near the free edge, then place a few stars on top. This creates a sparkling French-inspired variation.
Short Kawaii Nails
Short natural nails can carry the same aesthetic. Use miniature stars, flat decals, and one small character detail instead of large charms.
When to Wear This Manicure
Kawaii Pink Star Nails are perfect for occasions when you want your manicure to feel cheerful and expressive. They work beautifully for birthdays, vacations, concerts, girls’ nights, themed parties, summer events, weekend trips, and fun everyday style.
They are also a cute option when you want your nails to become part of your outfit rather than simply complementing it.
How to Style the Look
Kawaii Pink Star Nails naturally pair with blush pink, hot pink, white, baby blue, denim, lavender, and other soft pastels. A simple white top and light-wash jeans let the colorful manicure become the focal point.
For a stronger kawaii-inspired aesthetic, combine the nails with a pastel handbag, cute hair clips, pink accessories, or a soft cardigan.
Silver jewelry echoes the rhinestones beautifully. For makeup, try pink blush, glossy lips, defined lashes, and subtle shimmer around the eyes.
How to Keep the Design Looking Fresh
Apply cuticle oil daily and moisturize your hands regularly. A glossy detailed manicure looks much better when the skin around the nails is hydrated.
Wear gloves while washing dishes or cleaning. Raised decorations can catch on fabric or hair, so be careful with larger gems and charms.
If a rhinestone begins to loosen, repair it rather than pulling it away. Proper gel removal is also important because peeling polish can damage the natural nail.
A well-applied gel manicure can often last around two to three weeks depending on preparation, nail growth, and daily activity.
Frequently Asked Questions
Can This Design Work on Short Nails?
Yes. Use smaller stars, fewer decorations, and flat decals so the artwork remains clear.
Do I Need Rhinestones?
No. Glitter dots, holographic flakes, or silver polish can provide sparkle without creating a raised surface.
Which Base Color Works Best?
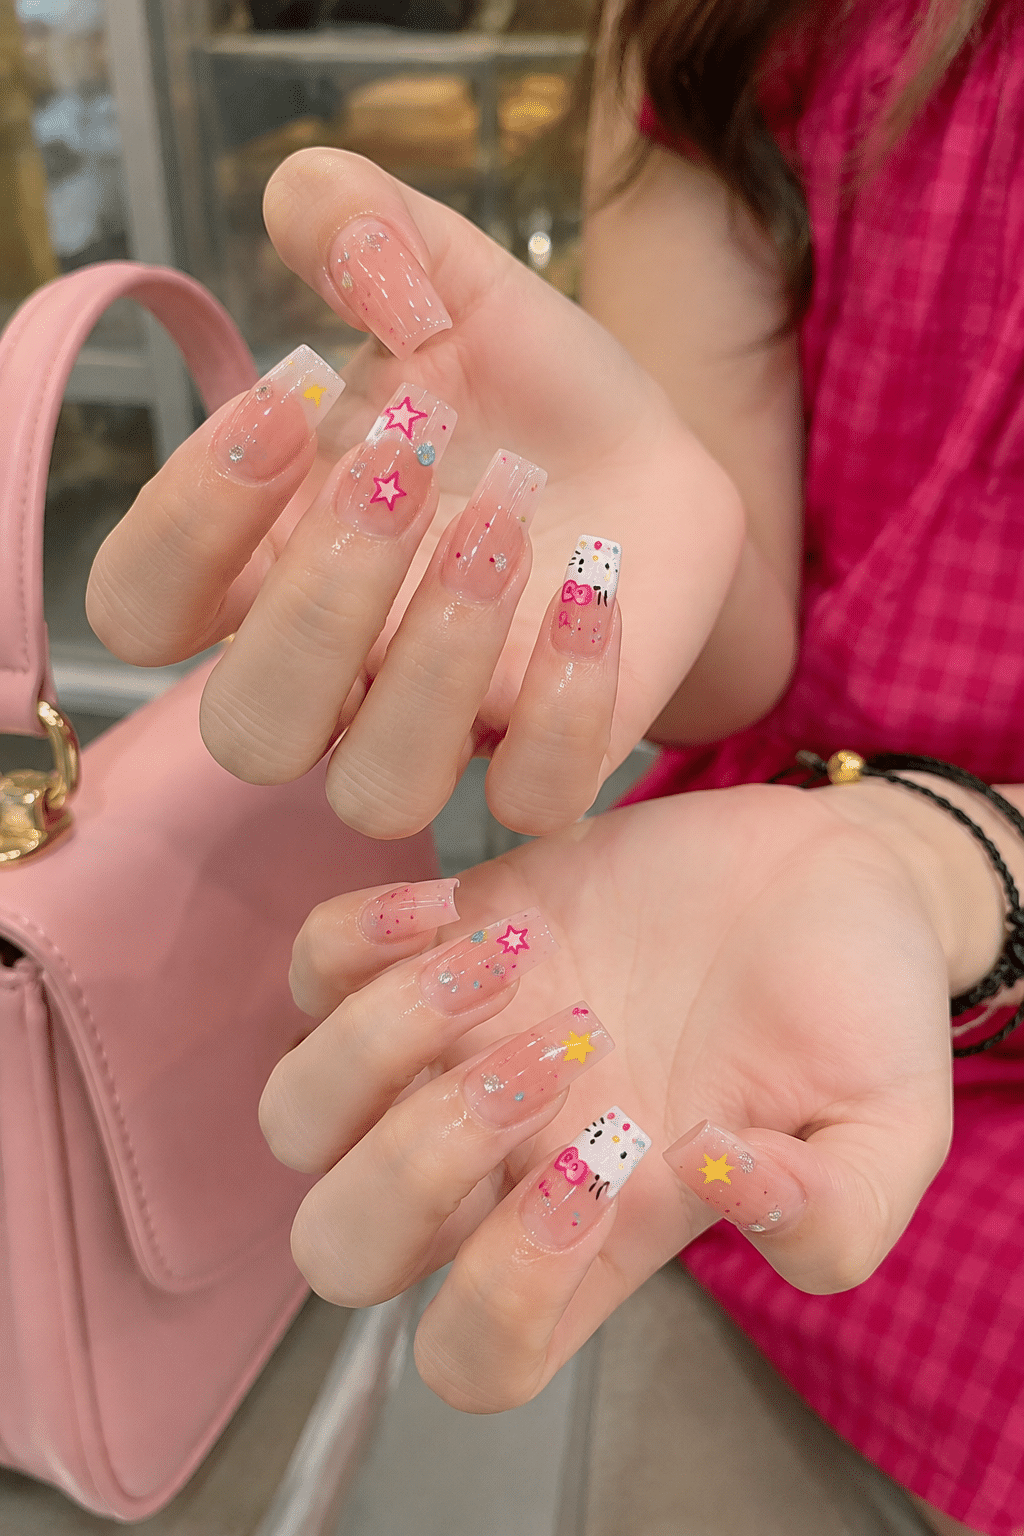
A sheer blush or jelly pink gives Kawaii Pink Star Nails the transparent, candy-like appearance seen in the inspiration.
Can I Change the Pink?
Absolutely. Fuchsia creates a bolder look, while baby pink makes the manicure softer. Lavender or baby blue can even become the main color if you want a completely different version.
Glossy or Matte?
Glossy is the strongest choice for this style because the shine enhances the transparent base, stars, and gems. Matte polish would create a much softer, less sparkly effect.
Final Thoughts
Kawaii Pink Star Nails bring together glossy pink, colorful stars, tiny rhinestones, cute character-inspired details, and playful pastel accents in one cheerful manicure.
The clear base prevents the artwork from feeling overwhelming, while the mix-and-match design allows every nail to have its own personality. Whether you recreate the fully decorated version or choose a simpler variation, this manicure is a fun way to embrace sparkle, color, and a sweet kawaii-inspired aesthetic.